
Real Estate Photography Tips – Window Exposures [Tutorial]
![]() by Leo Hoang · Mar 22, 2016
by Leo Hoang · Mar 22, 2016


One of the properties I had to photograph today was a lovely, well presented, 2 bedroom flat in Chelsea.
I always face a particular challenge with every property I photograph; and that is window exposure.
Due to the dynamic range of light, from the highlights to the shadows, it’s not always possible to retain window detail within one frame. So with the magic of Photoshop, we will have to blend in the window exposure.
Equipment Used
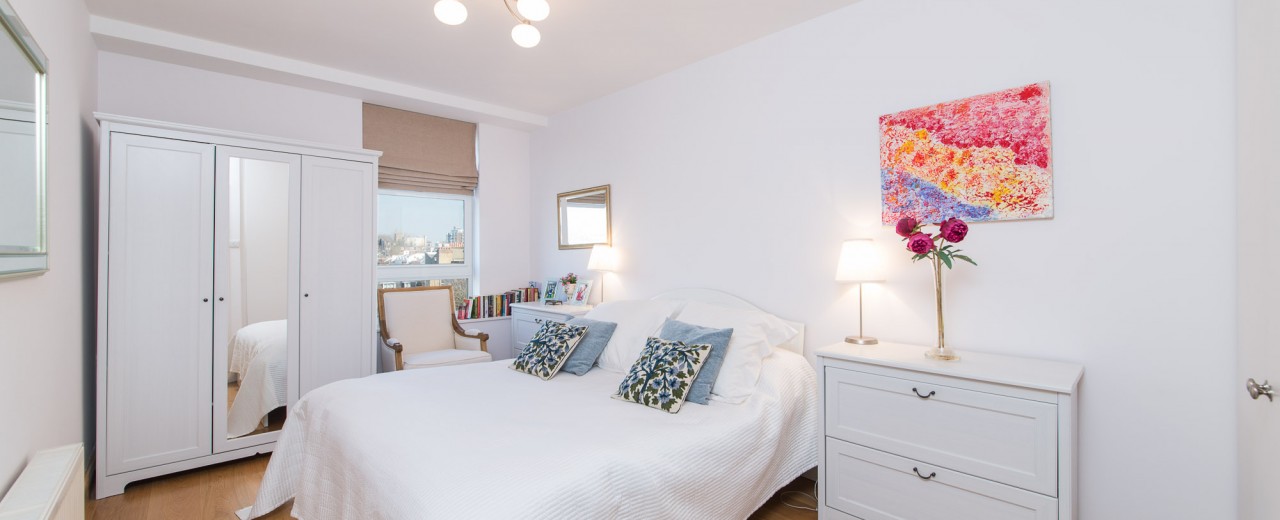
How I Shot It
I placed the camera right into the corner of the room; and was basically shooting through the door frame. The mentality I find that some photographers have is that they have to be in the room they are photographing, which is not true as I am quite regularly shooting from outside the room to maximise space.
- ISO: 200
- Aperture: f/8
- Shutter: 1/25sec
- Focal Length: 14mm
- WB: Auto
- Flash Power: ¼ (Bounced)
As you can see from above, the interior exposure is relatively decent excluding the blown out windows at the back. There is slight barrel distortion from the lens with a bit of a vignette and due to the AutoWB setting, the white balance is a little off.
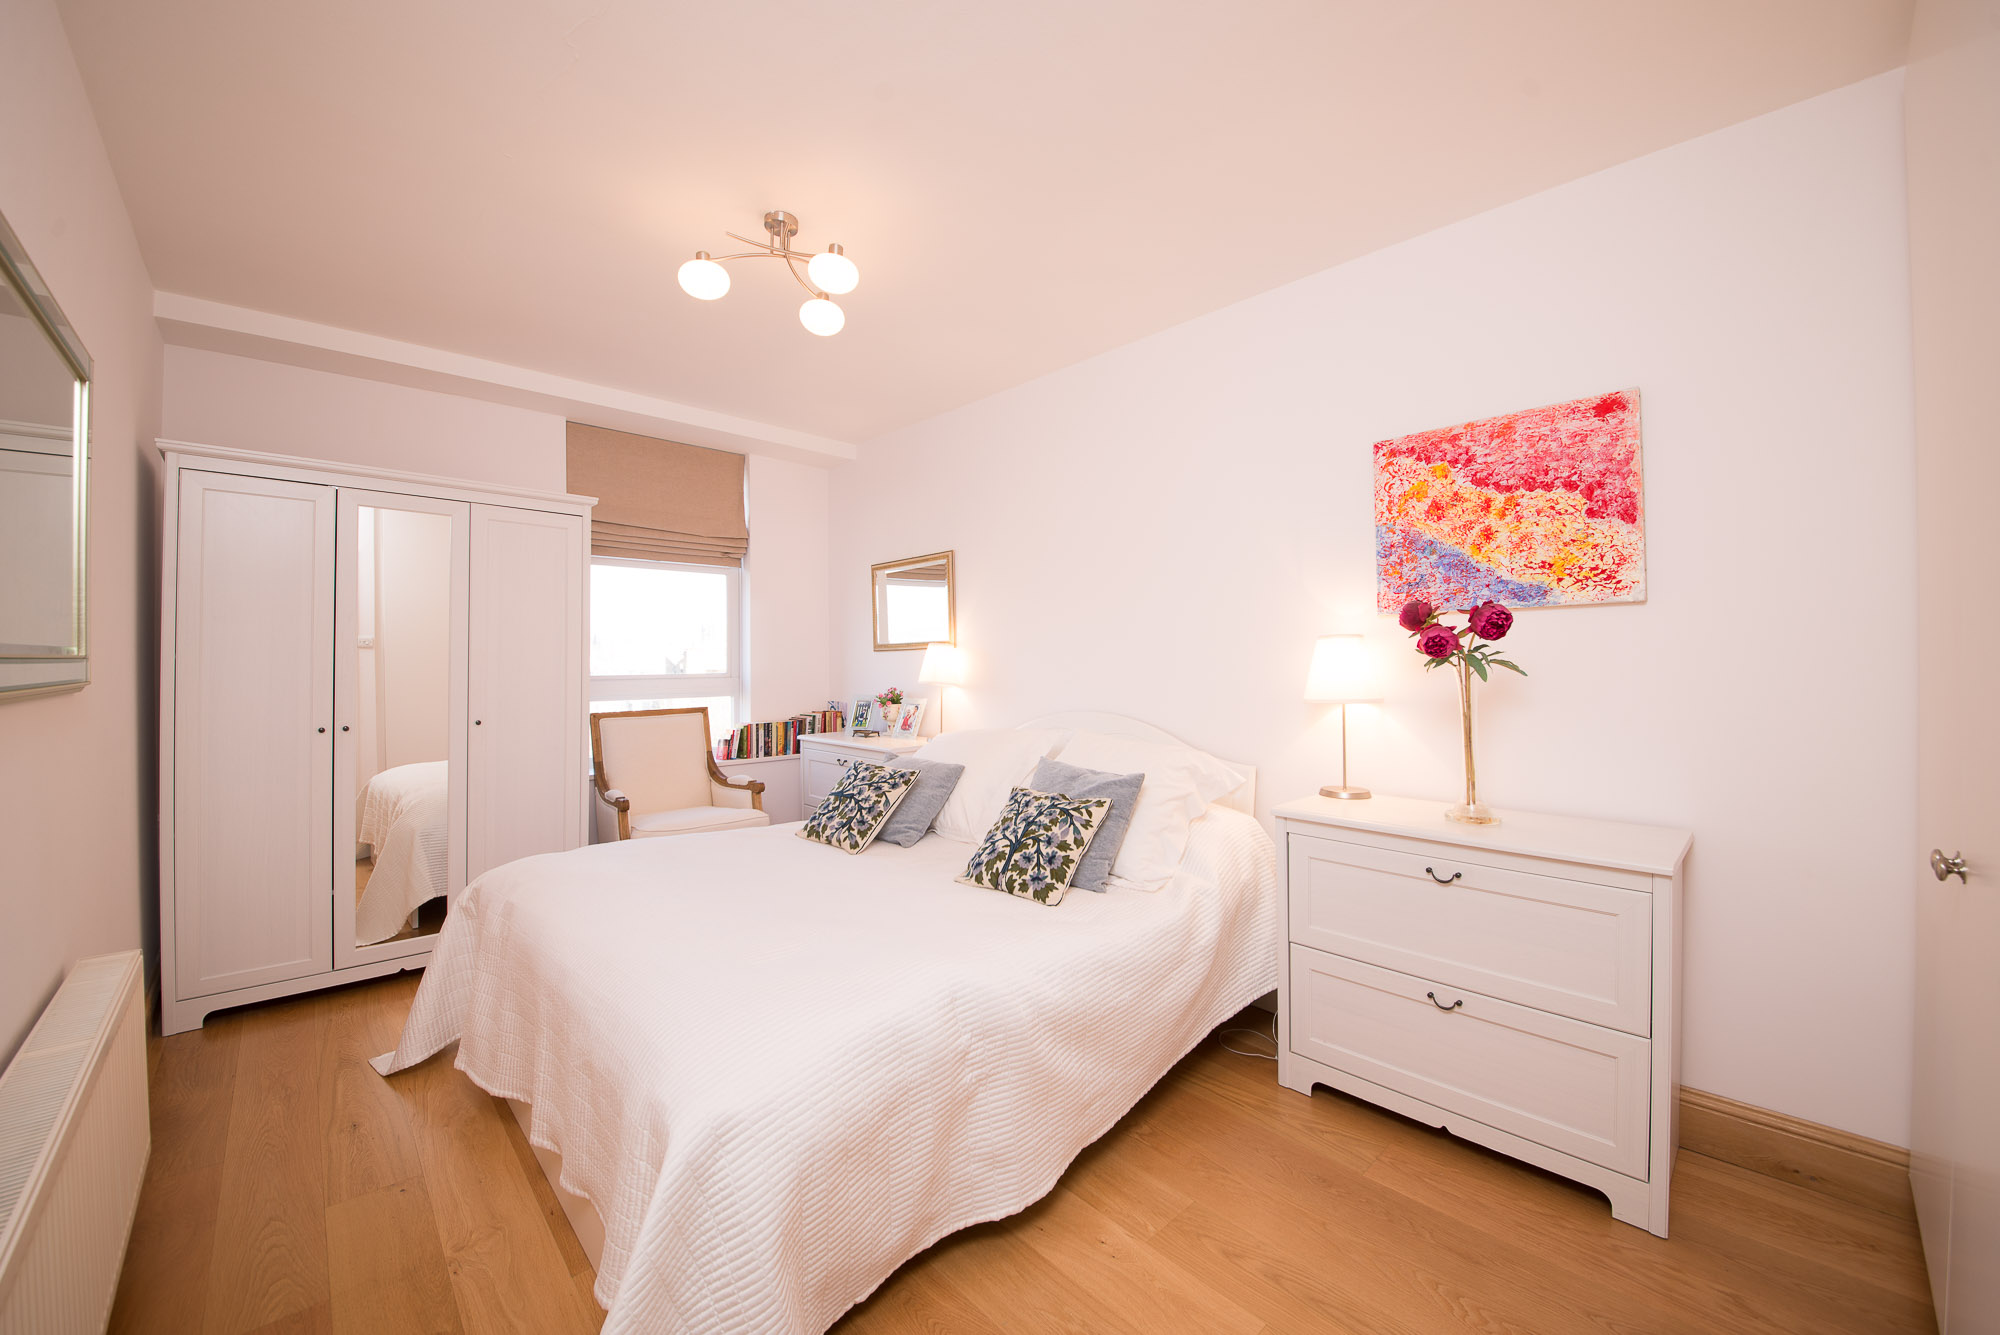
- ISO: 200
- Aperture: f/8
- Shutter: 1/250sec
- Focal Length: 14mm
- WB: Auto
- Flash Power: ¼ (Direct Flash)
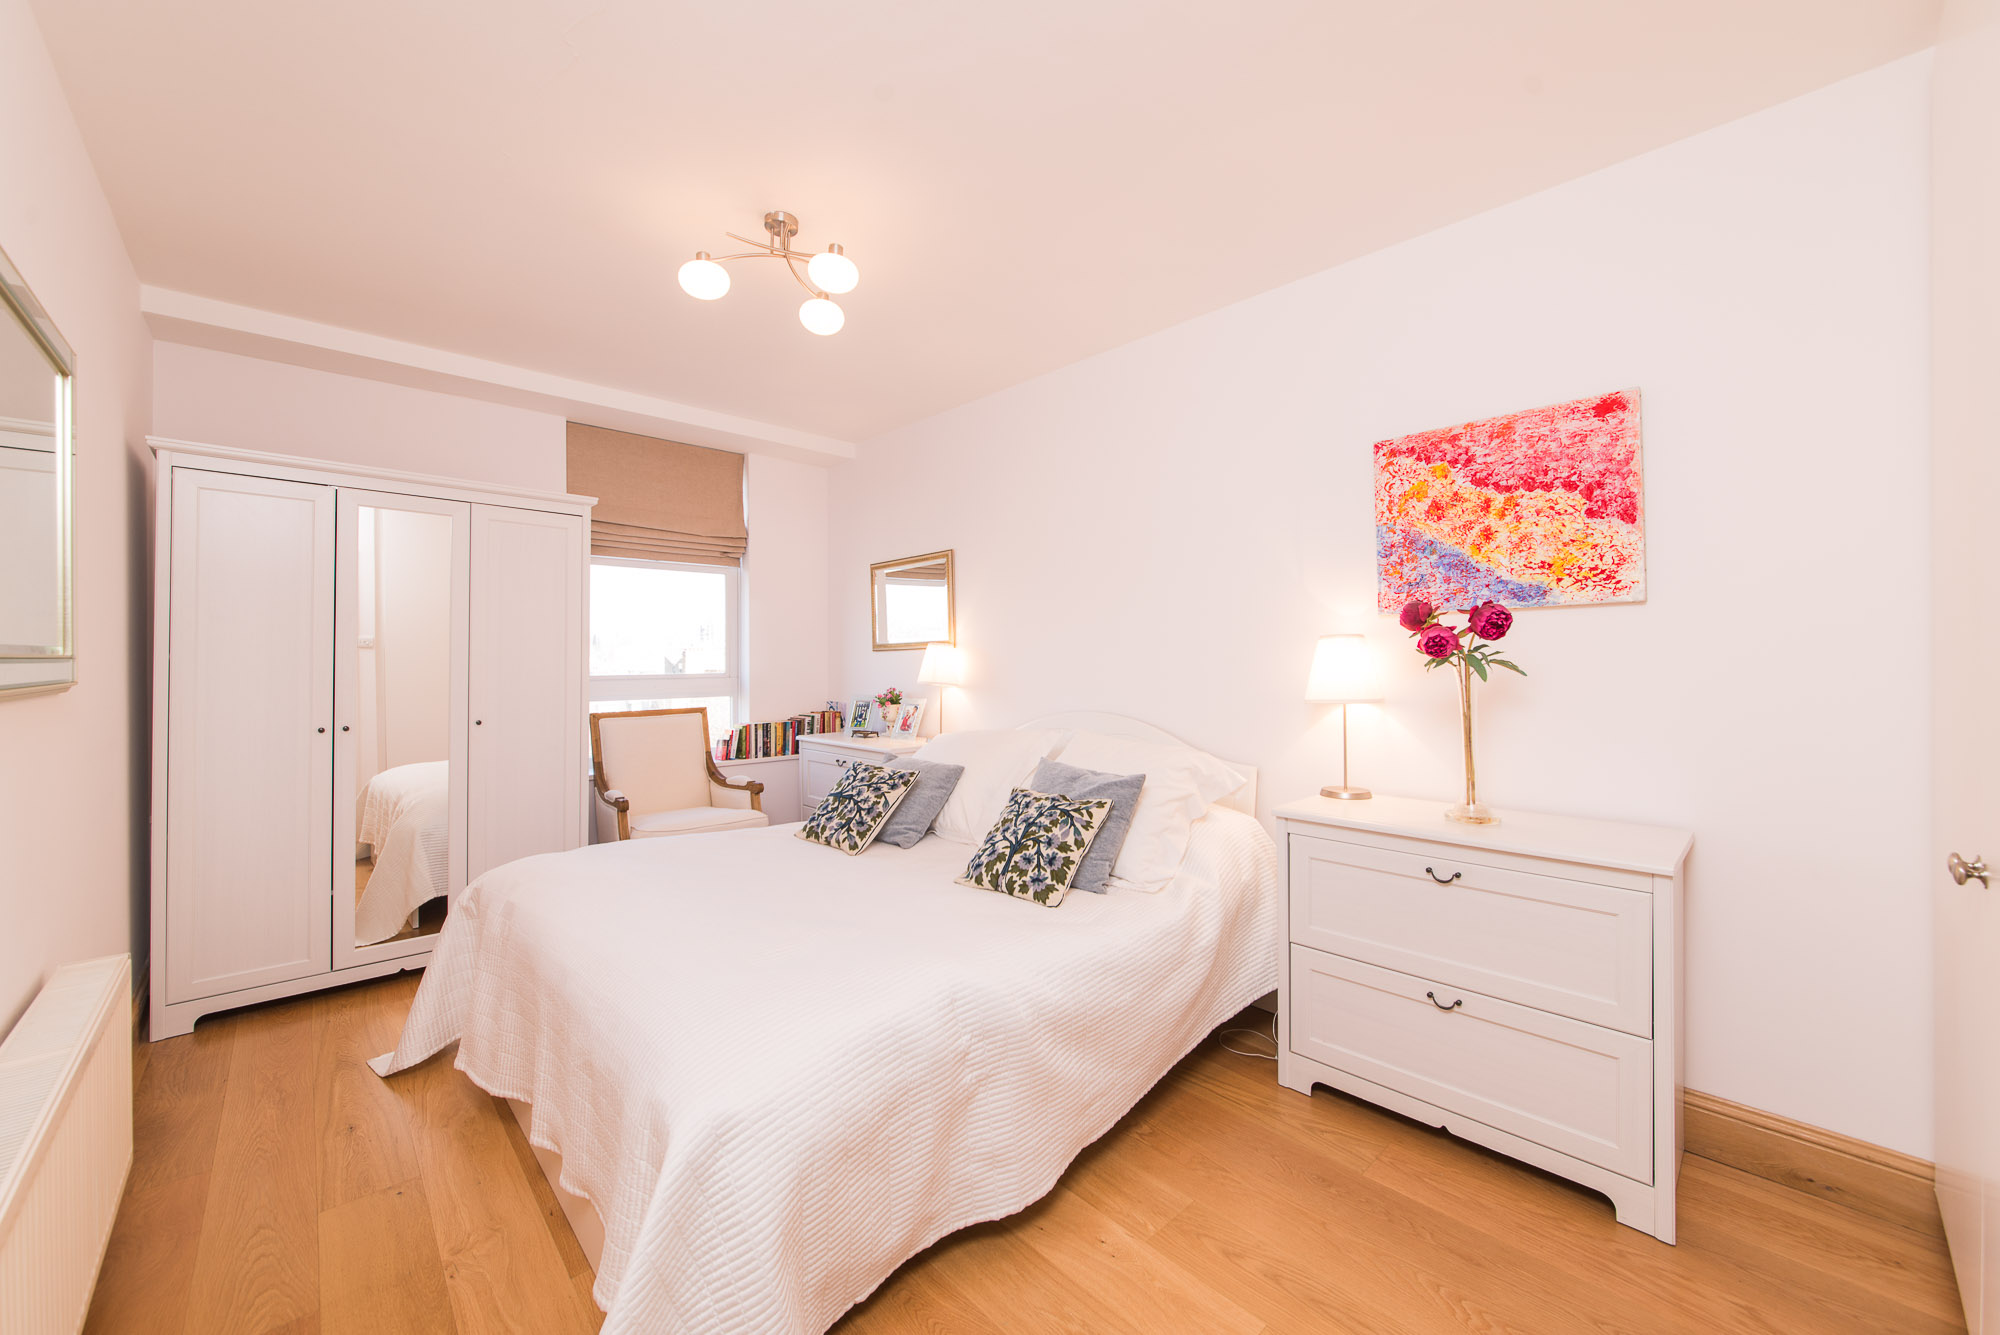
How I Edited It

I applied my standard import Preset which brings down the highlights and brings up the shadows a touch by +/- 20 and enables profile corrections to correct the barrel distortion and vignette.
As the white balance was set to Auto, the camera did its best to balance the ambient light from the window, the bedside lamps, ceiling light and the Meike MK-910 flash. The white balance is decent, however it is more towards the warm side, so I cooled the image down by lowering the white balance temperature to 4000, and adjusted the tint to -9.
I also added a slight graduated filter which brought the exposure down my 1/3 stop on the right hand side of the frame.
Now this shot is relatively good to go except for the one detail of the window exposure.
As previously stated in the “How I Shot It” portion, there is a second frame where I shot direct flash and this frame was taken specifically for the window exposure. I increased the shutter speed to 1/250sec which is 4.3stops darker than the original frame. 4.3stops would be unrecoverable from the RAW file and even if information could be pulled back, the colour tones would be completely flat.
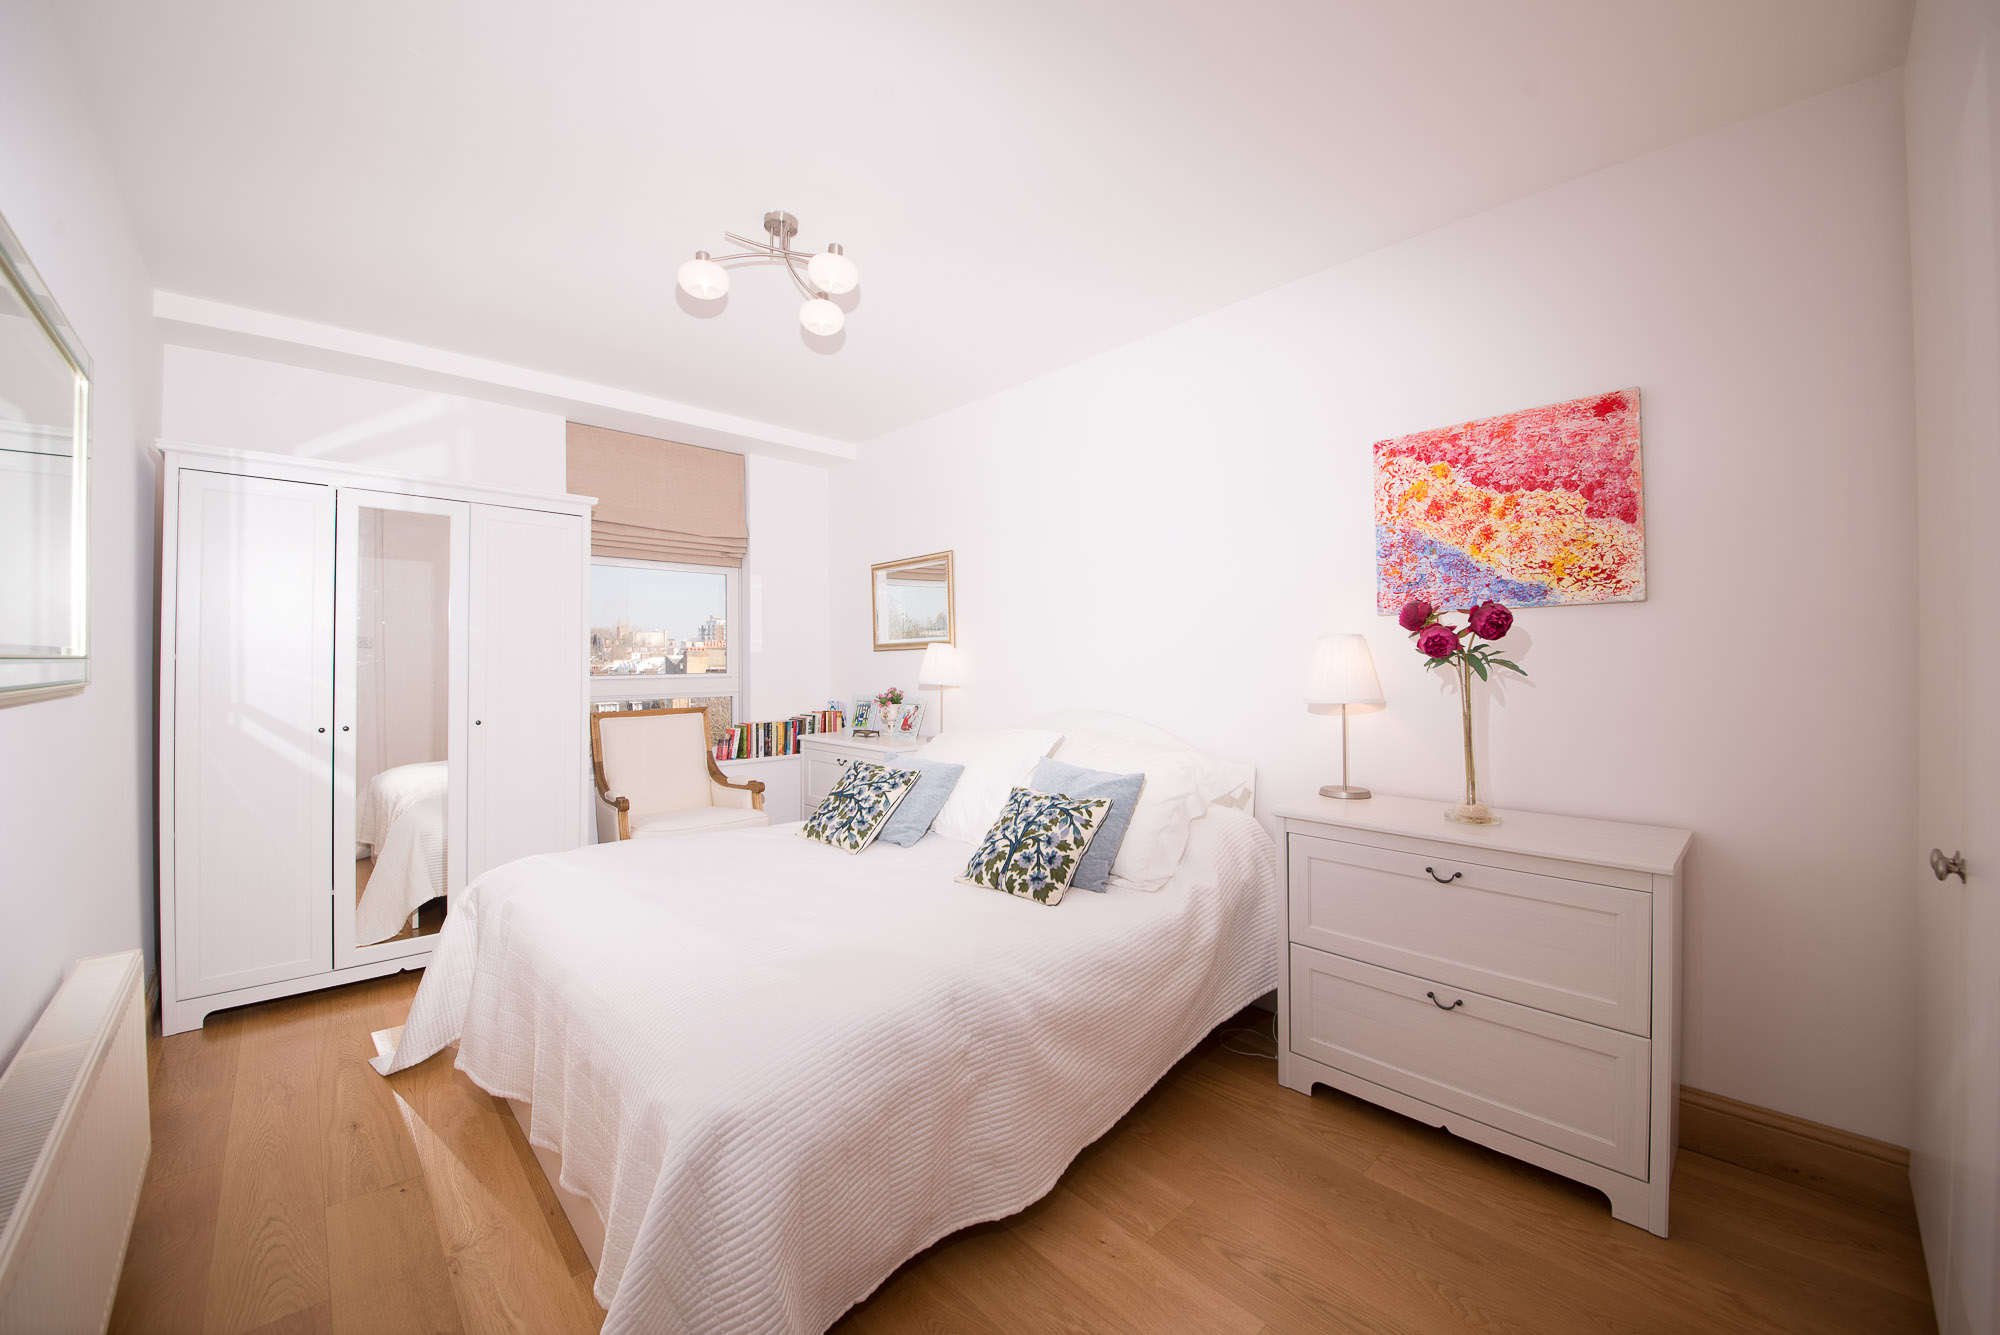
I simply copied the exact same editing settings from the first shot onto the second shot and then added 500K to the white balance.
After which, I highlighted both images, Right-Clicked and selected “Open as Layers in Photoshop”.
I then ensure my key frame is laid on top and then select the polygon tool and mask around the window.
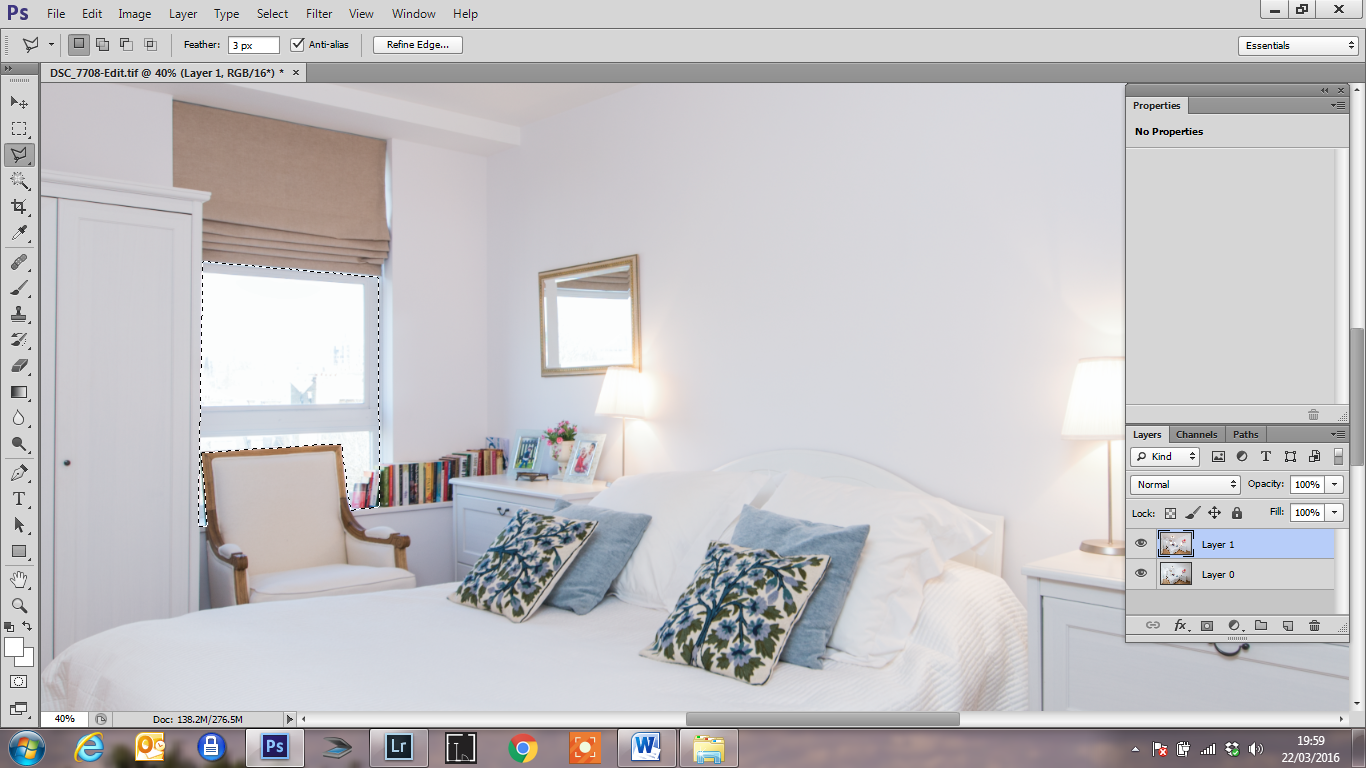
I do not worry about the internal window panes, I just select around the frame. I even did such a rough job, I selected through some of the books which sat on the window seal.
Once the window frame has been selected, I simply hit the delete button.
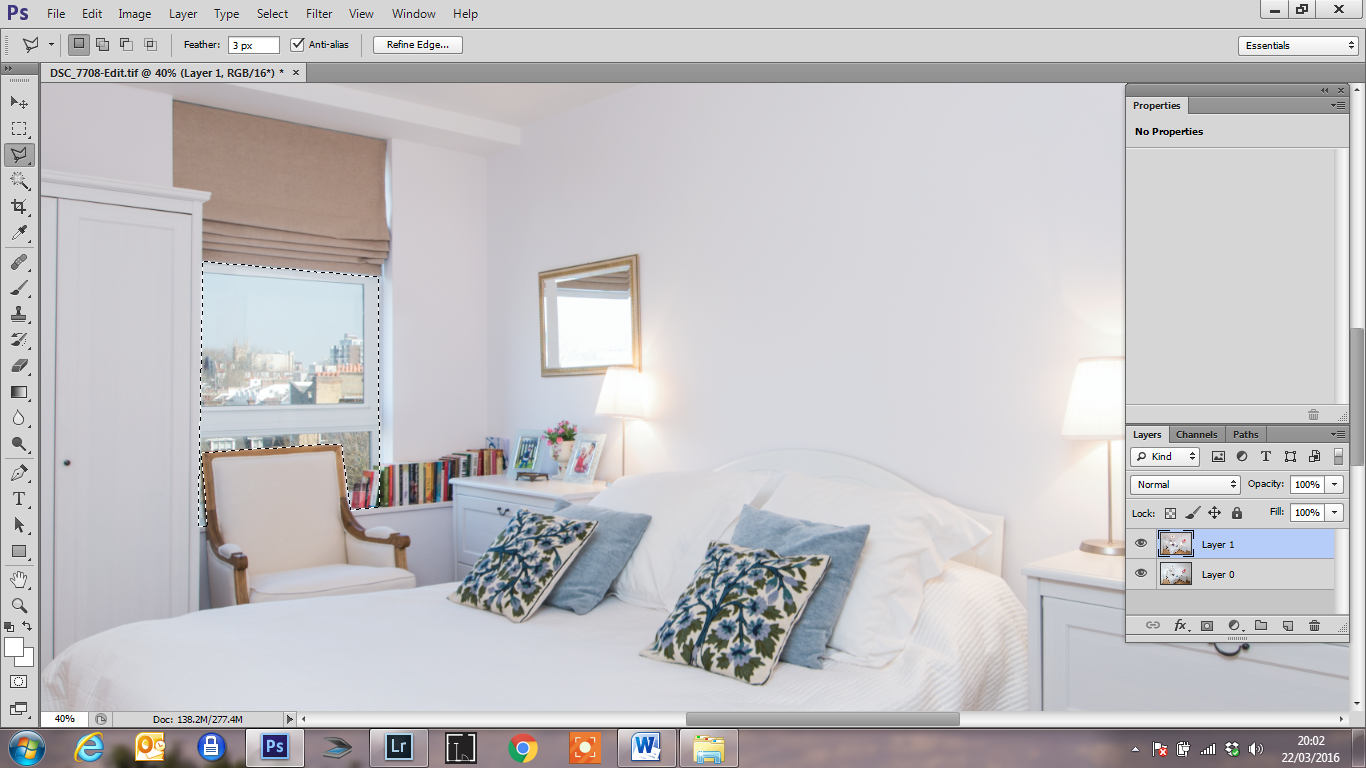
Now the window detail has been retained!
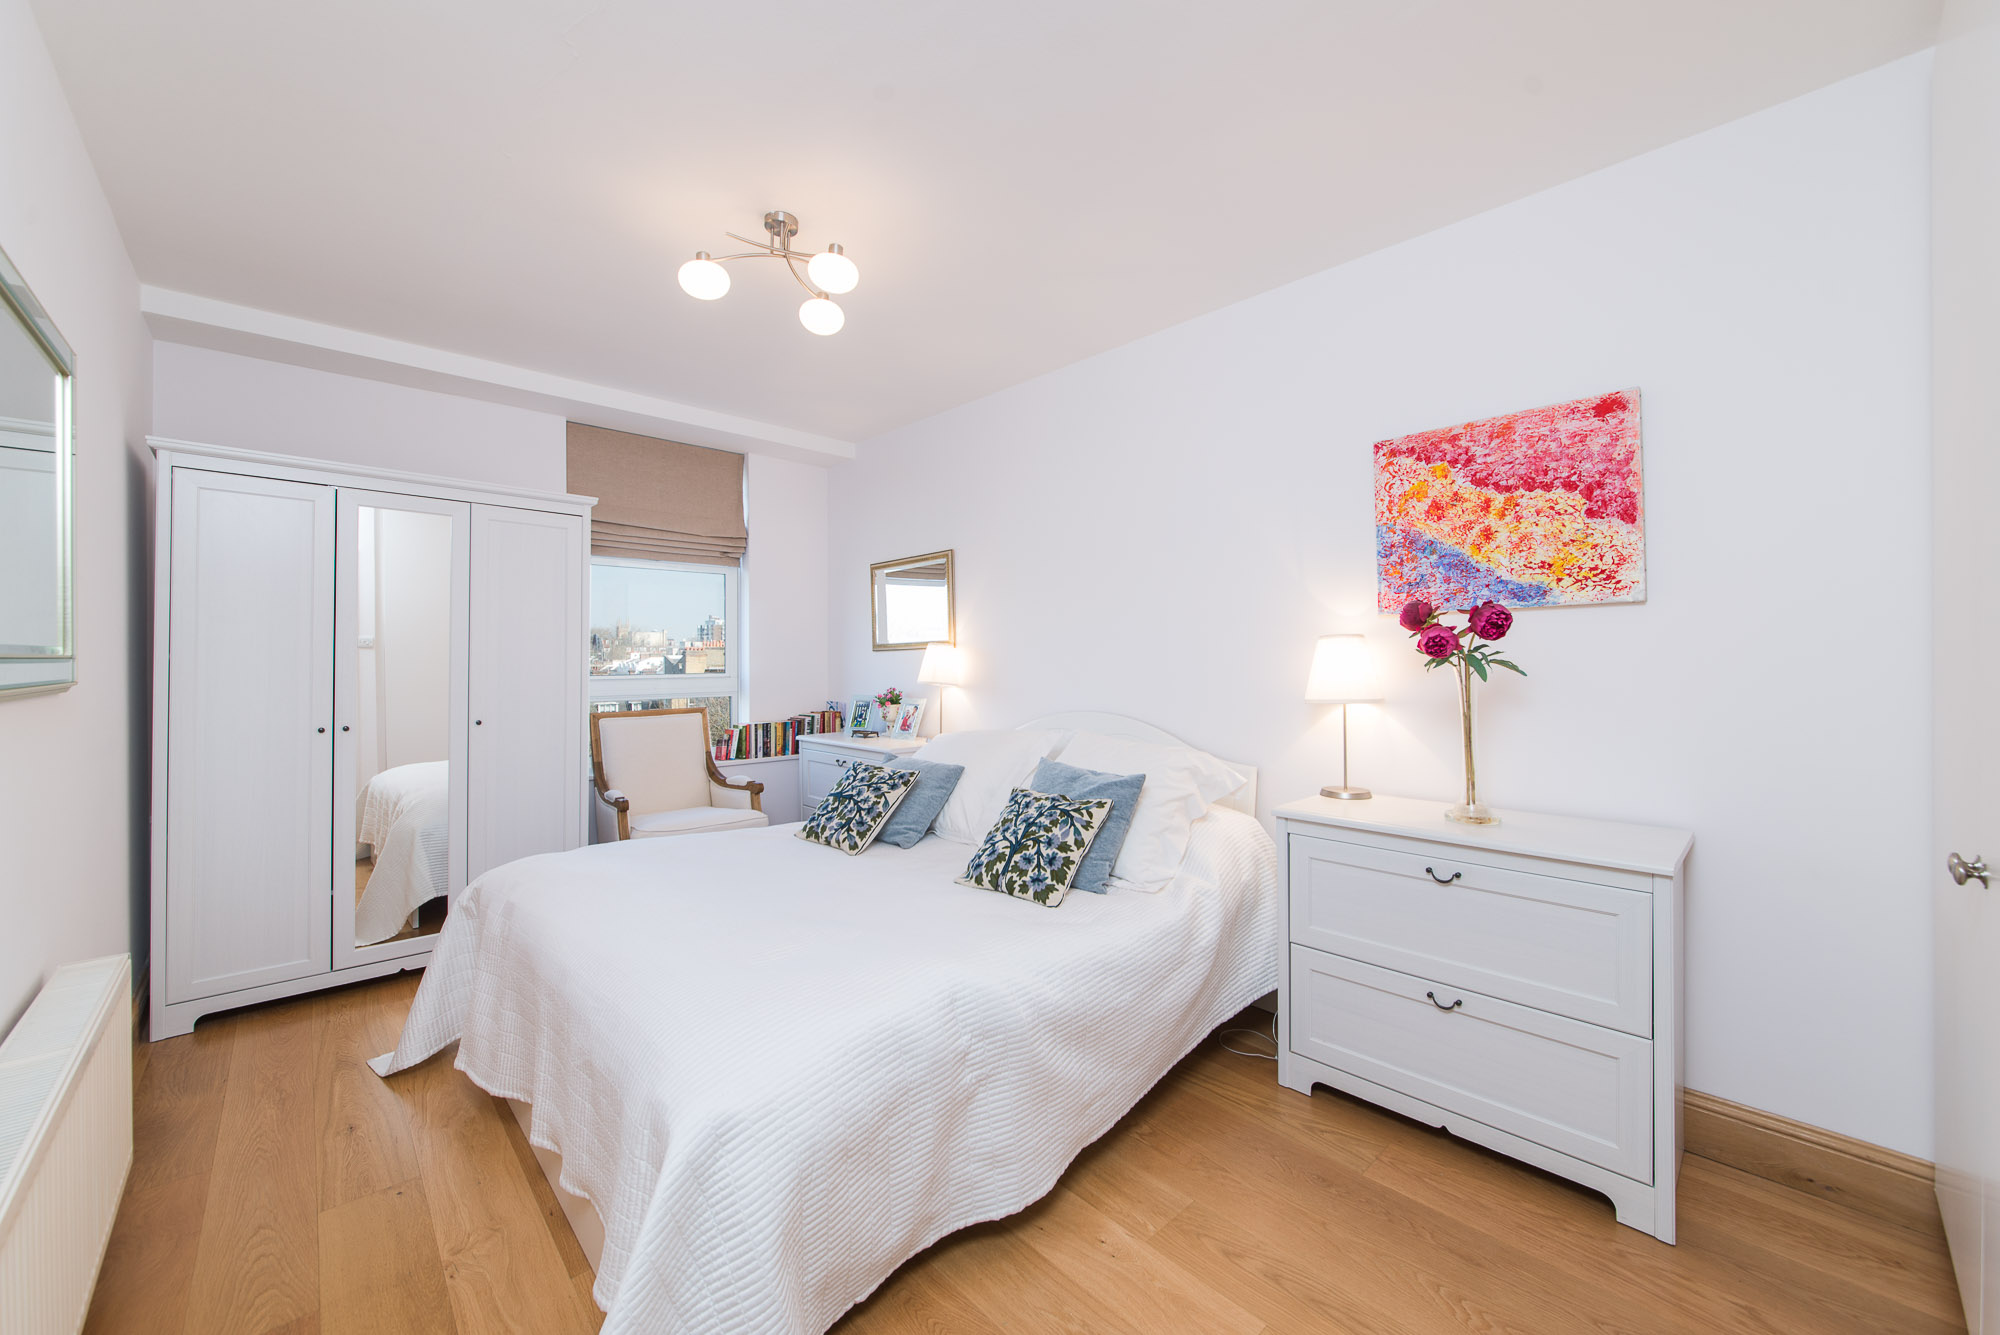
From here, I simply save the image, re-import into Lightroom
Conclusion
The purpose of photographing the second frame with direct flash was so that when I make my selection on the key frame, I didn’t have to select each window pane or be particular around the edges of the books.
This method of recovering window detail is much more efficient than masking out each separate window pane, as well as gives a much more pleasing look than if you were to attempt to balance the flash with ambient to retain all the details.


Thank a lot , outstanding article
I Love Your Site!
Very informative, thanks for sharing
really nice post